Virgil- 3d Character Concept sketch
WIPs 01


Sketch – Spike from COWBOY BEBOP:


PAOLO MALDINI Likeness test ue4


Skin Texturing/Shading in UE4


WIP#2 Secondary + Tertiary Forms, and experimenting with TexturingXYZ


Gabby – Character Concept Sketch-


– Creature Design Sketch-


– POLICE DETECTIVE Sketch-
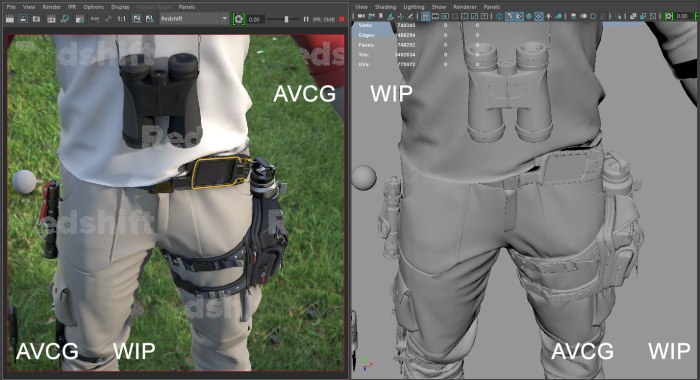
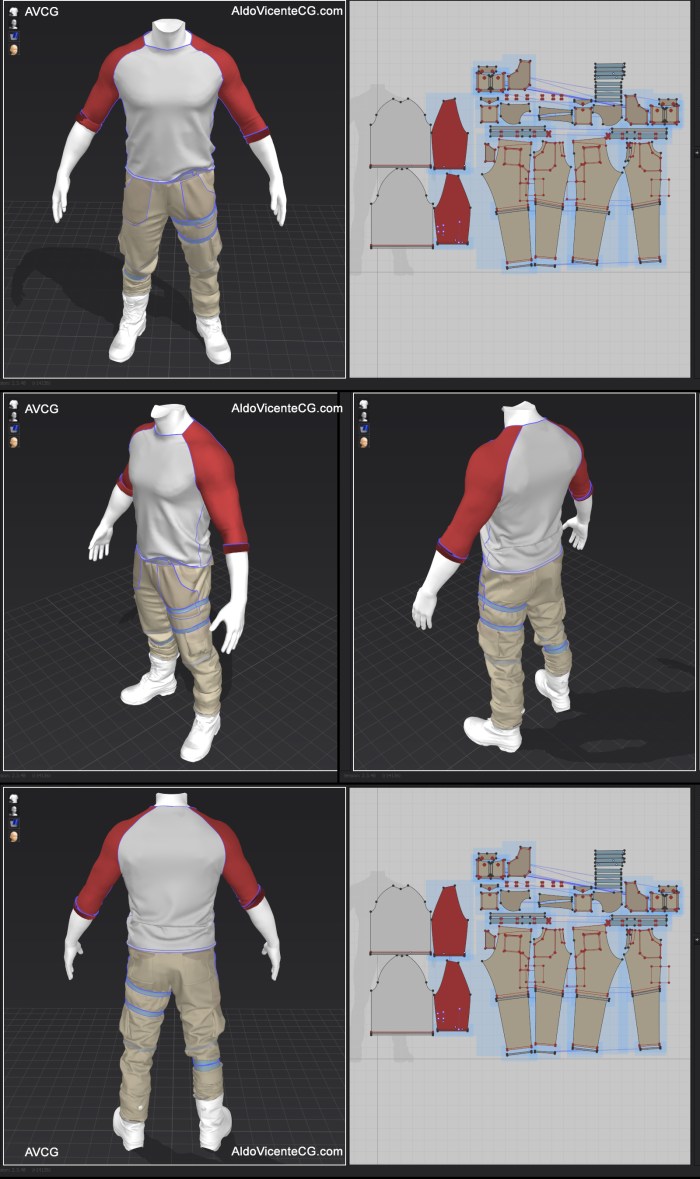
WIP#4 Completed Retopo on Shirt and Pants <30k Tris. Test bakes with Temp textures:


WIP#3 Started Retopo on the Shirt! Still need to get the folds on the sleeves.


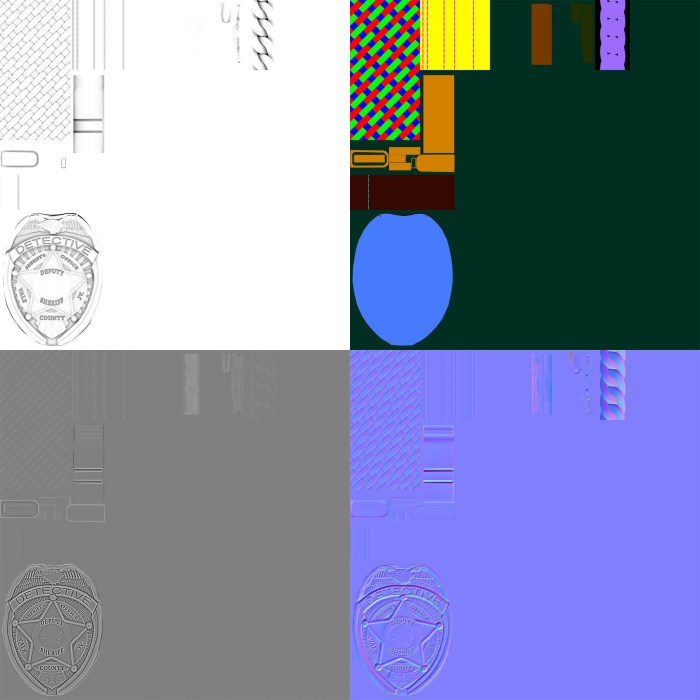
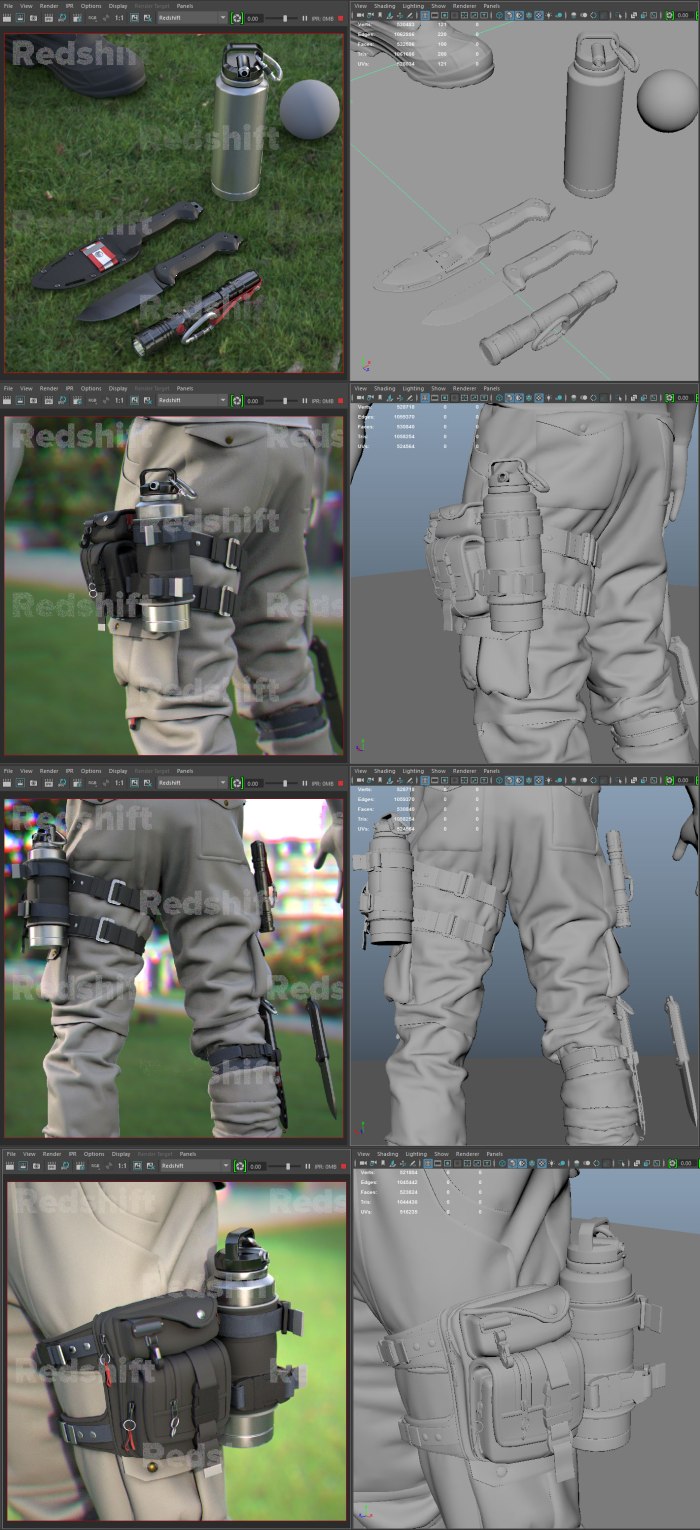
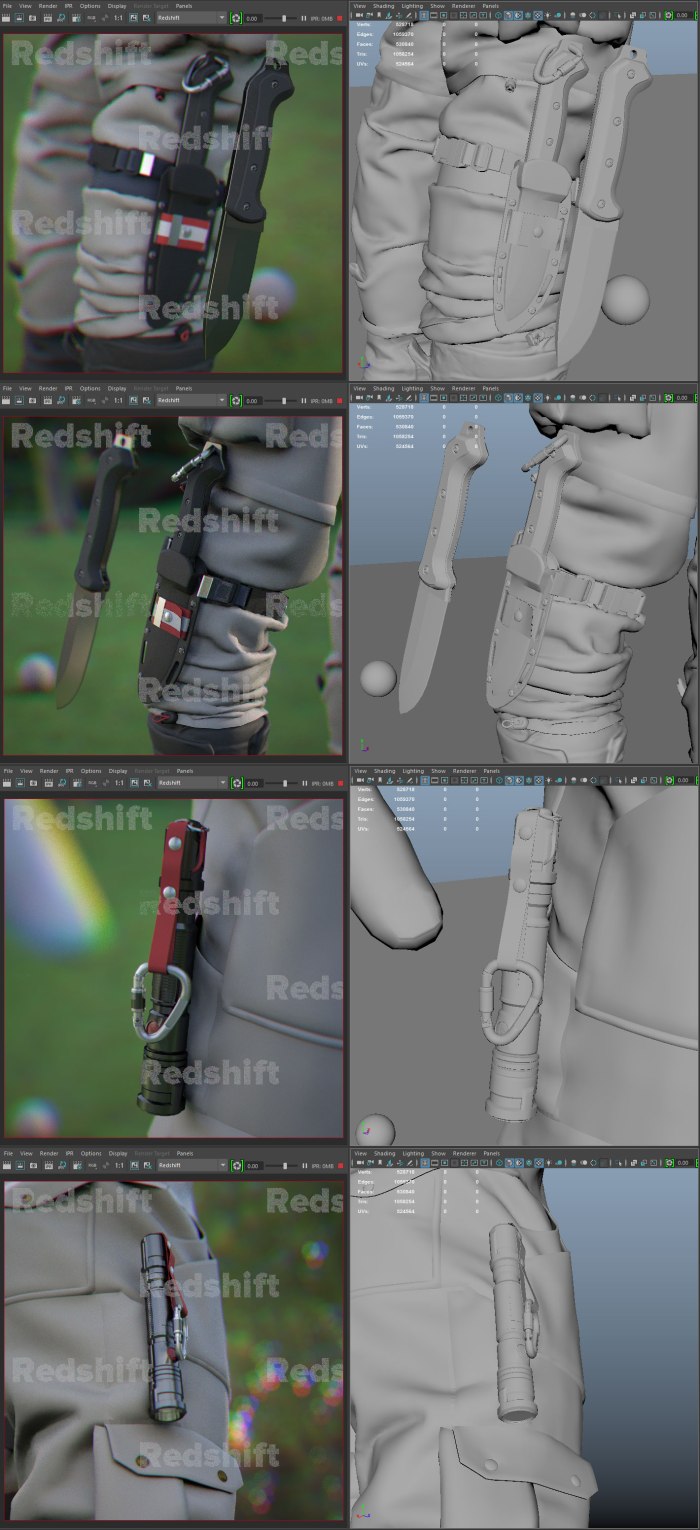
WIP#2 Testing out trim-sheet texturing on a few of the Utility belt pieces and the Badge:


Displayed at 2048×2048, using about 40% of the UV space so far. Hoping to be able to cram all the other Utility belt gadgets in there too.
WIP#1 Sculpting! About 75% Through the high-poly:


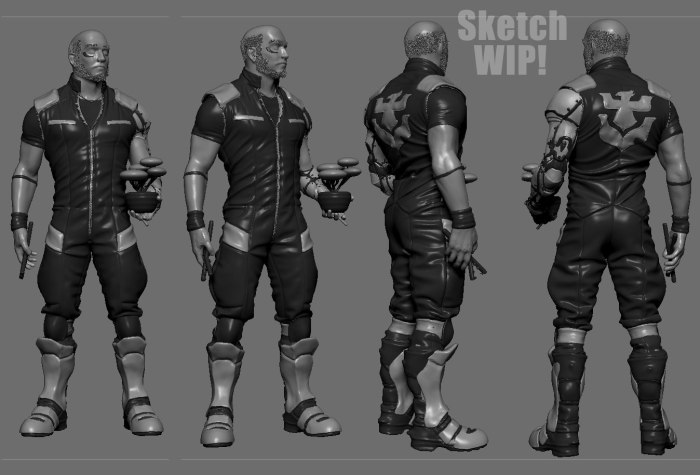
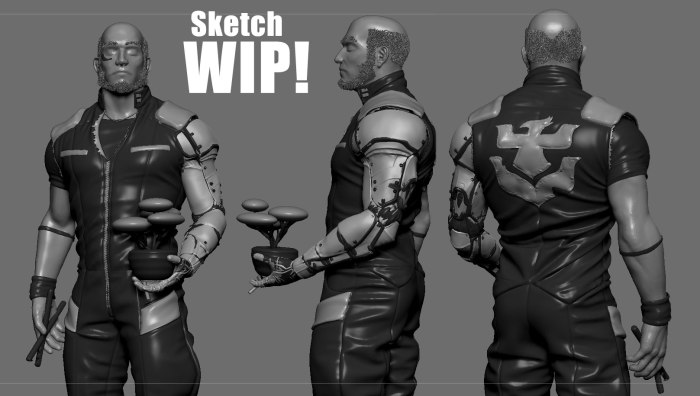
Solomon – 3D Character Concept sketch


Sketch- JET BLACK from COWBOY BEBOP:
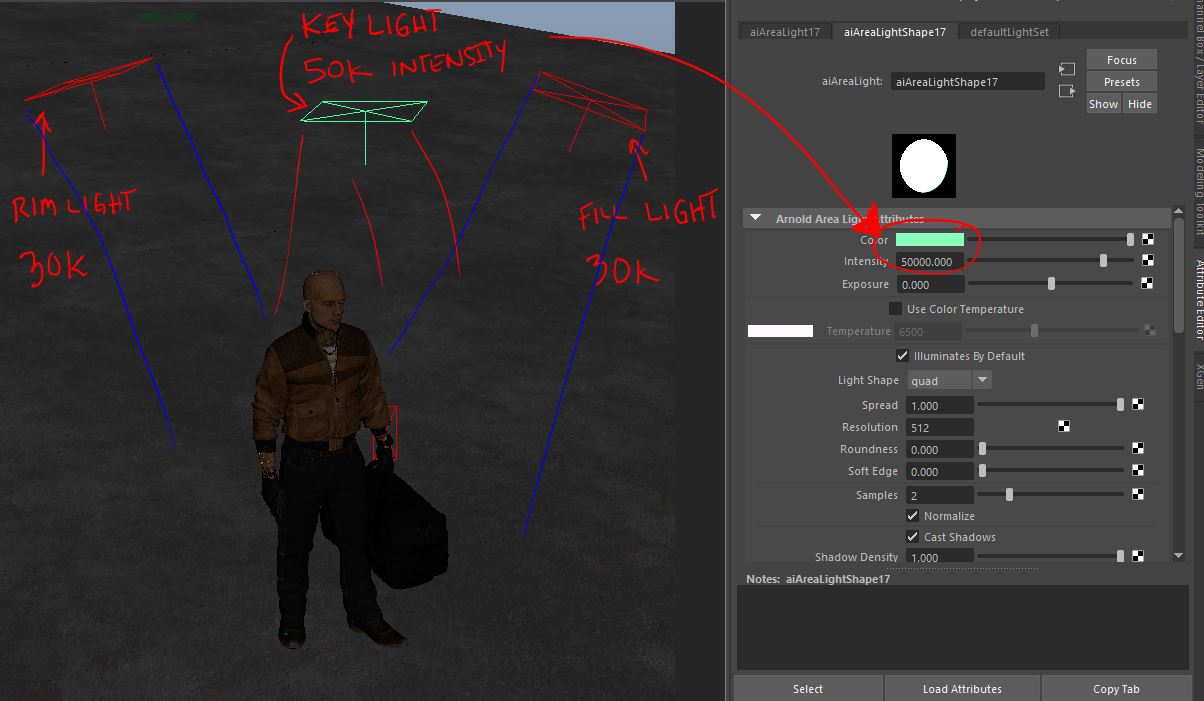
WIP #4: Some rough lighting/composition ideas using the zbrush sketch model.


WIP #3: A rough Zbrush sketch to help figure out the overall design:


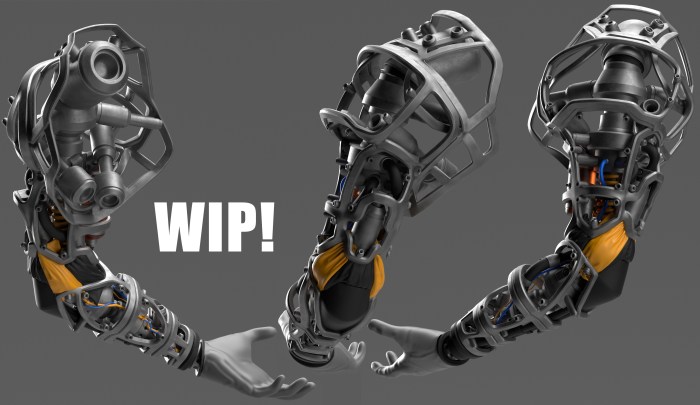
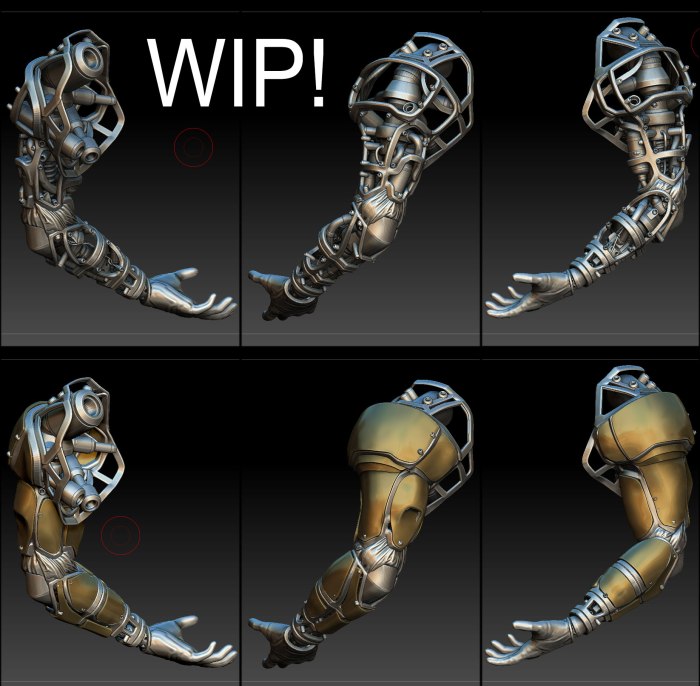
WIP #2: MechArm
WIP #1: Built base-mesh from cube in Zbrush, took to marvelous to make the jumpsuit.
————————————————————————– ==========================================================================————————————————————————–
4/21/2017
4/18/2017 Got a little time to jump back into this!
3/14/2017

————————————————————————–==========================================================================————————————————————————–
3/12/2017
————————————————————————–==========================================================================————————————————————————–
3/10/2017:
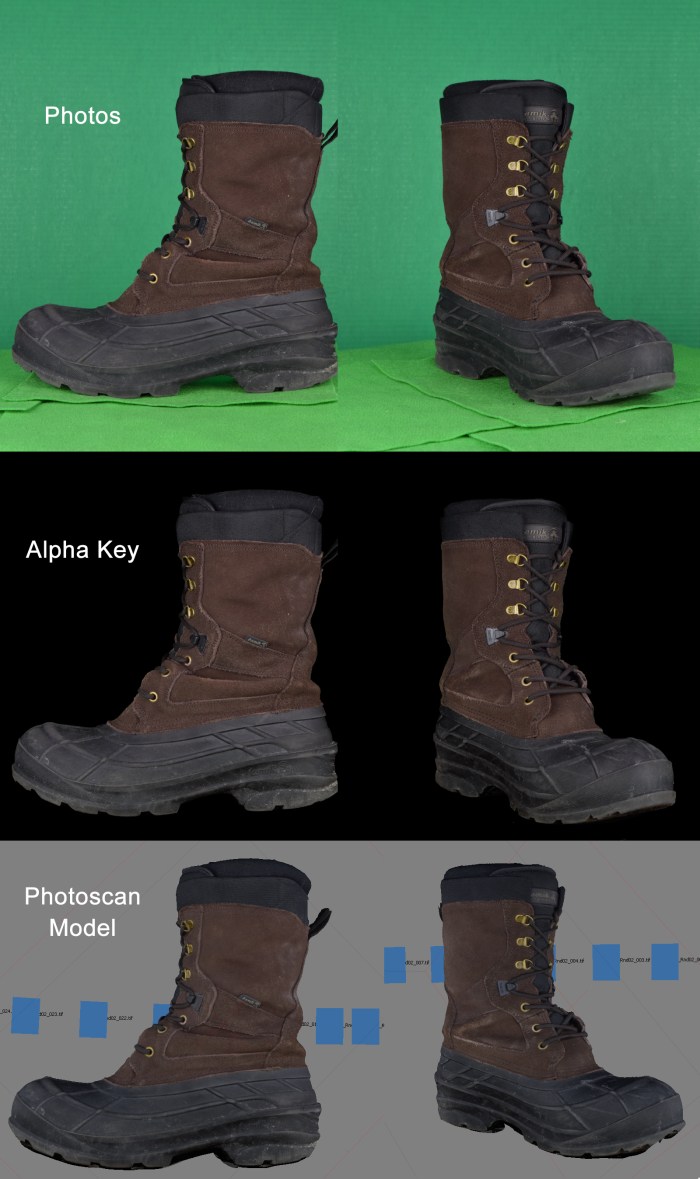
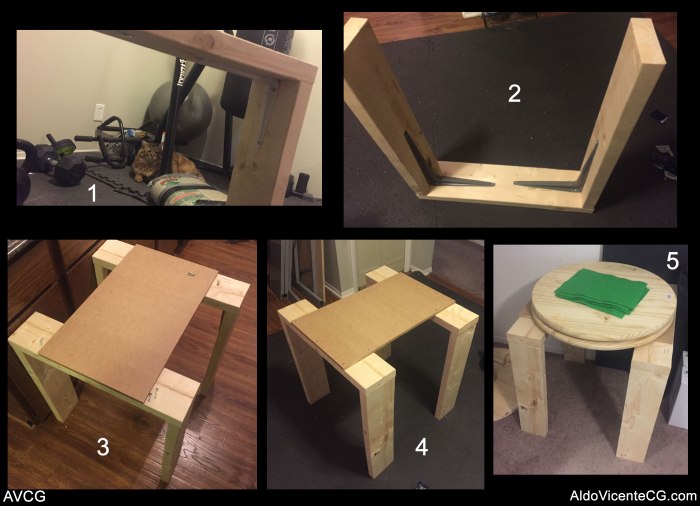
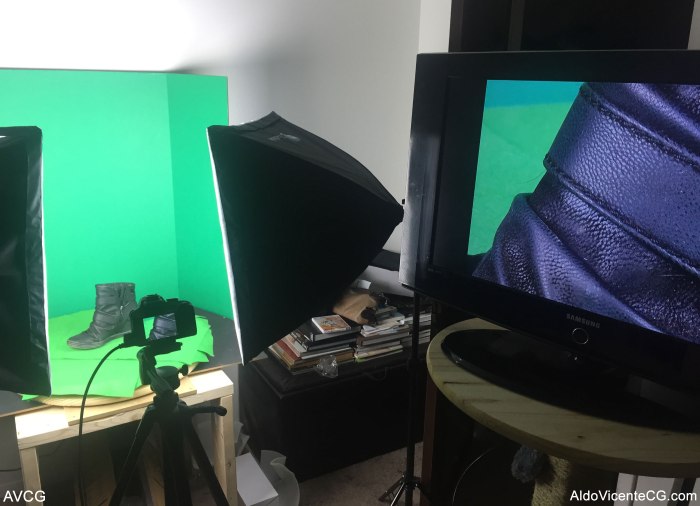
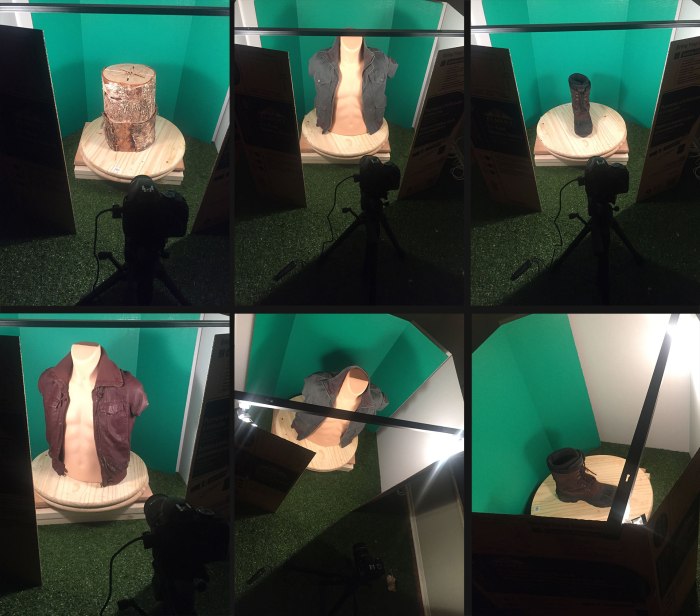
Scanned some snow hiking boots for the scout character
————————————————————————–==========================================================================————————————————————————–
3/8/2017:
Cargo Pants – Marvelous Designer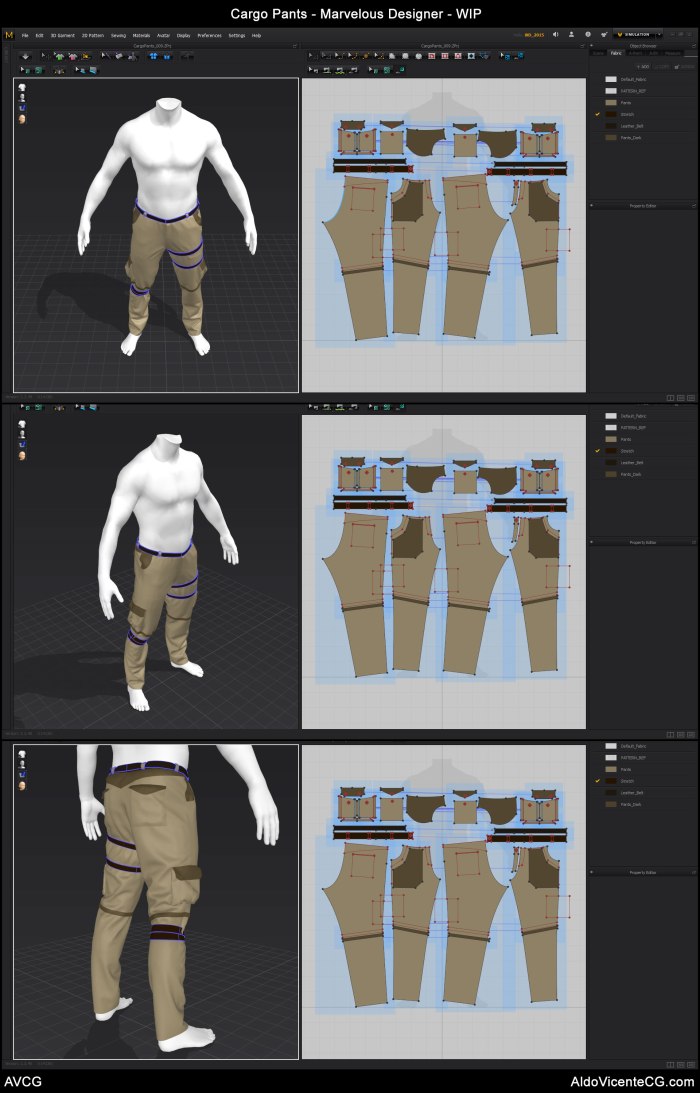
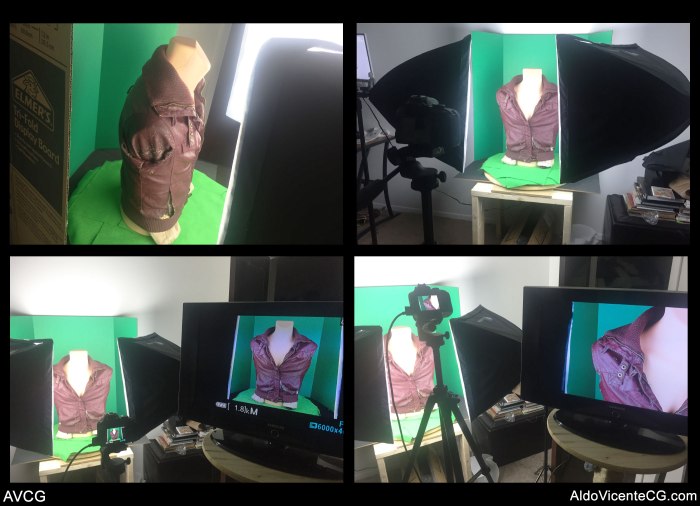
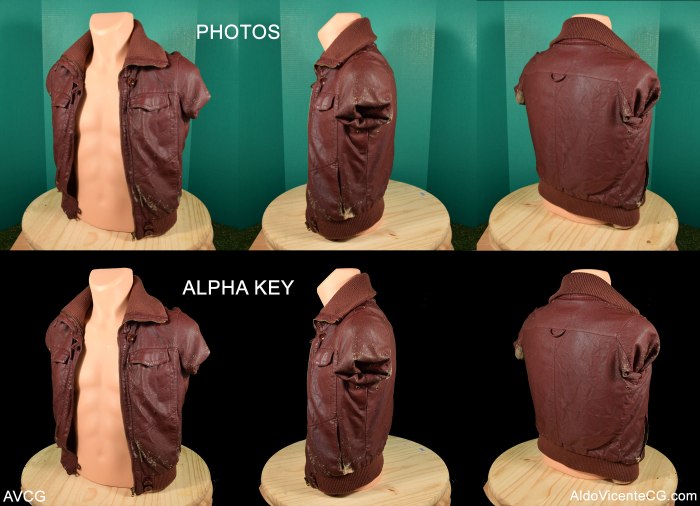
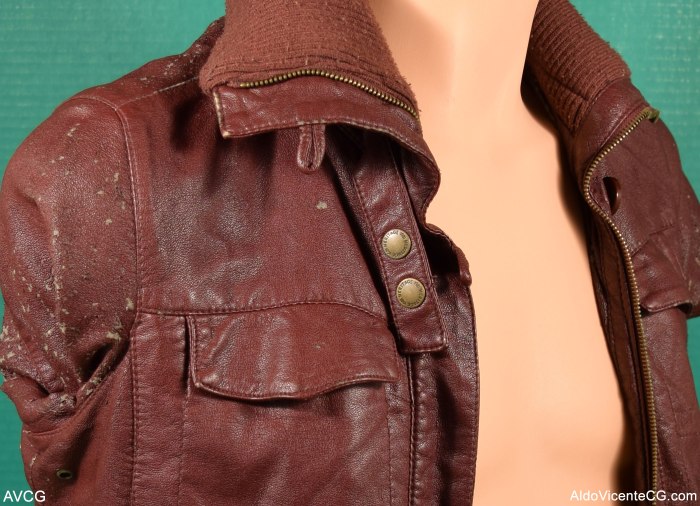
Vest Jacket – Photoscanned/Sculpted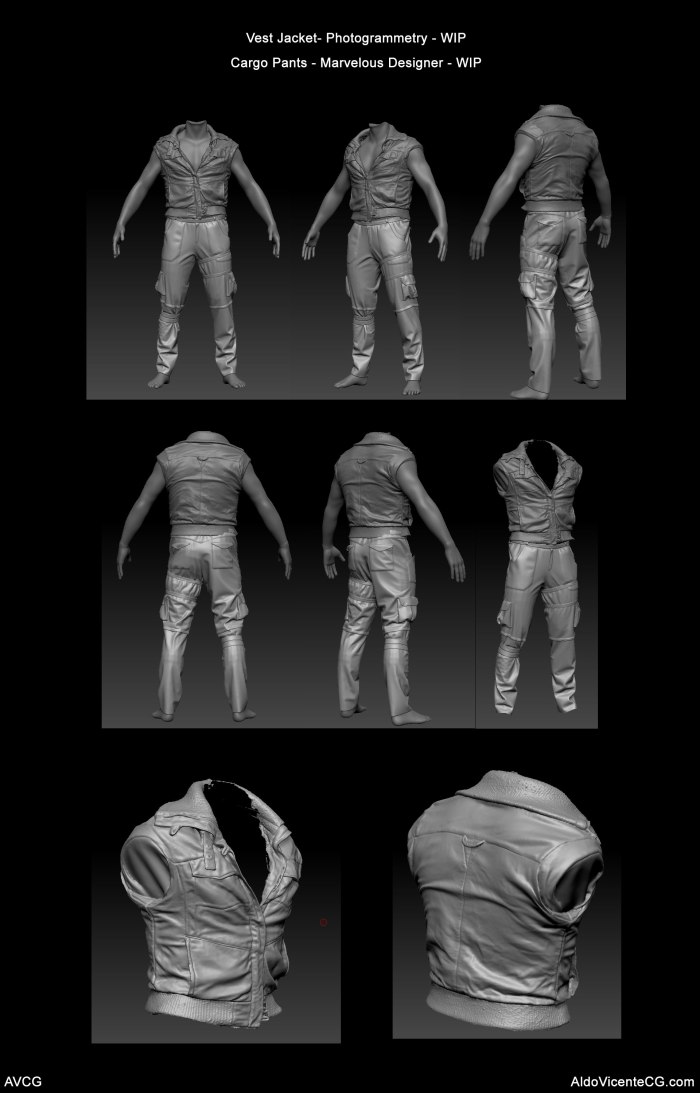
————————————————————————–==========================================================================————————————————————————–
3/6/2017 PHOTOGRAMMETRY TEST
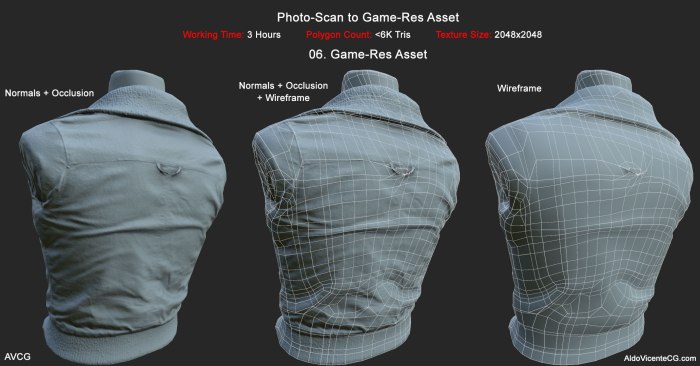
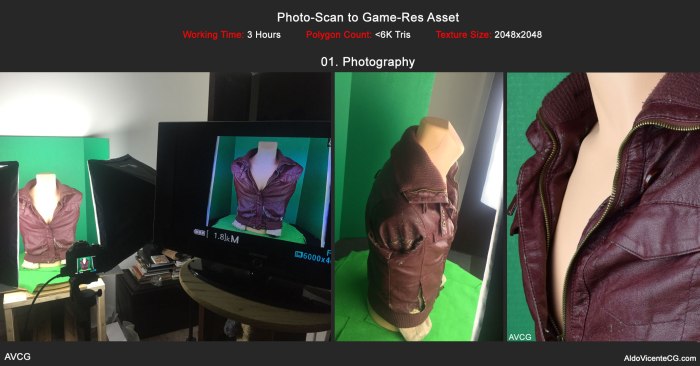
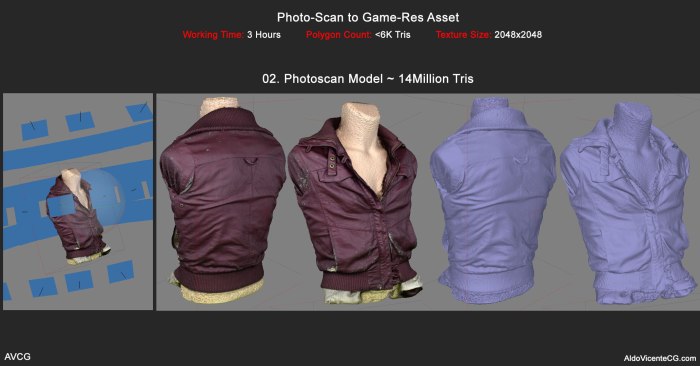
Photoscan to Game-Res Asset – Quick Workflow Test
01.Photography:
02.Photoscan:
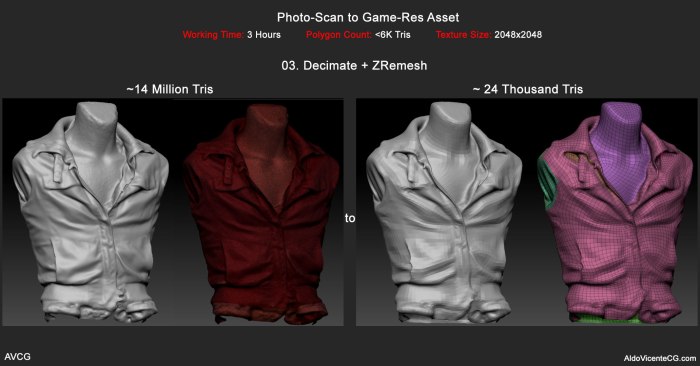
03. Decimation + ZRemesh:
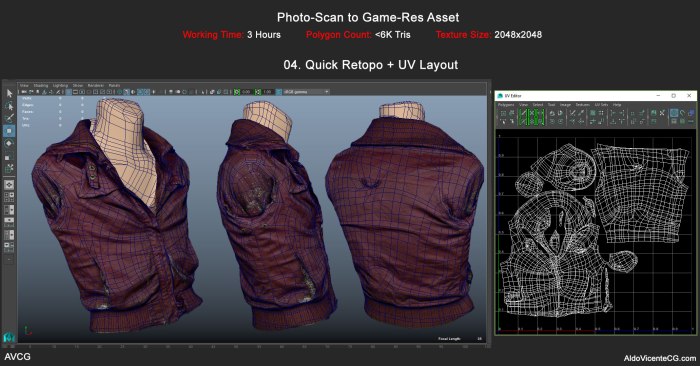
04. Quick Retopo + Quick UVs:
05. Baking Maps: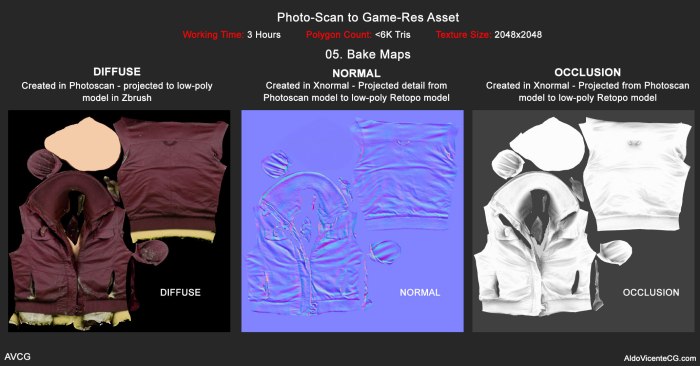
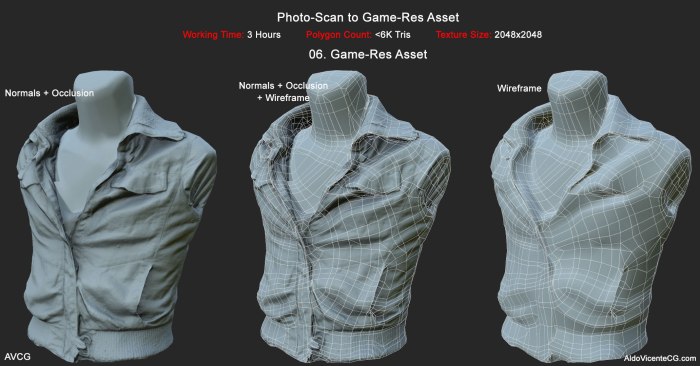
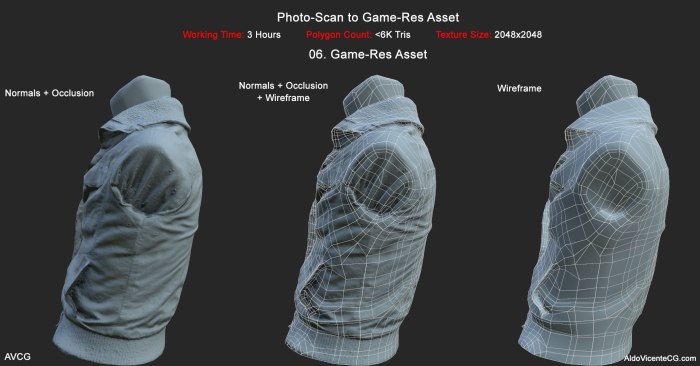
06. Game Res Asset:
Applied the Normal and AO maps onto 6K Retopo mesh
 ————————————————————————–==========================================================================————————————————————————–
3/2/2017: PHOTOGRAMMETRY TESTS
————————————————————————–==========================================================================————————————————————————–
2/20/2017 – PHOTOGRAMMETRY TESTS

————————————————————————–==========================================================================————————————————————————–
2/19/2017 – PHOTOGRAMMETRY TESTS
————————————————————————–==========================================================================————————————————————————–

You must be logged in to post a comment.